Let’s Make Greek Yogurt!

blueberries, desert, cute-4006863.jpg

Don’t you just love the rich, creamy taste of Greek Yogurt? How would you like to make it right from your own kitchen? You can absolutely do this, and I will give you a step-by-step tutorial right here…

You just need 3 tools and 3 ingredients to create this:

  • An Instant Pot or pot on the stovetop
  • Yogurt Thermometer
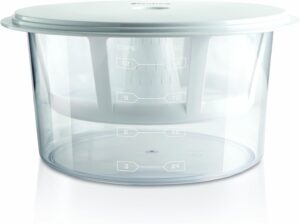
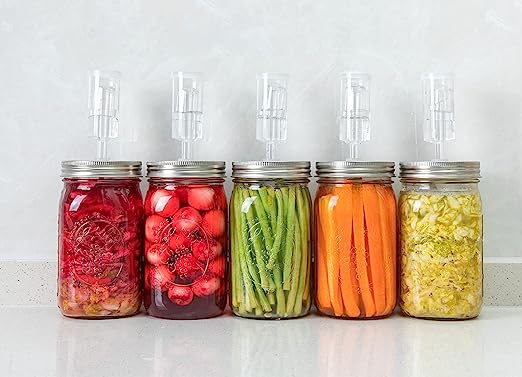
  • Greek Yogurt Maker / Strainer
  • ½ Gallon Organic Milk
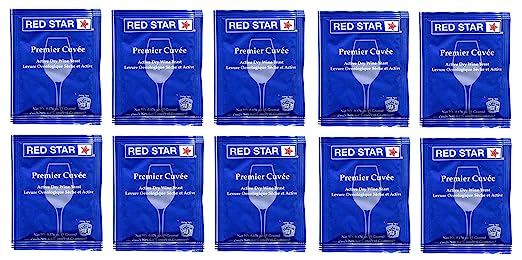
  • 2 tbsp. Tempered Culture Organic Yogurt
  • Desired Flavors – Vanilla, Honey, etc.

I use an Instant Pot and local raw milk to get the best consistency, but you can make this on the stovetop with store bought milk. Because I have only made this with my IP, I will be sharing this version for now…


INSTRUCTIONS:

Set Instant Pot to Disinfect for 5 minutes with 1 cup of water

Remove water and add ½ gallon of milk.

On the “Yogurt” setting, set to Boil for 10 minutes at 180 degrees.

Allow to cool down to 110 degrees (stir occasionally and test temperature – place pot in an ice bath if needed).

Add 2 tablespoons of tempered culture to a small bowl (use store bought organic “cultured” plain yogurt as your starter). Whisk in 1 cup of your warm milk to combine, then add back to your pot).

Put lid on and adjust setting to “Yogurt” for 8 hours on low.

Place pot (covered) in refrigerator for an additional 6-8 hours.

Strain out whey, transfer to a container, add desired flavors and refrigerate.

Now this is where you can make “good” yogurt, or you can make GREAT yogurt… I like to make mine extra thick and creamy with no liquid, so you can either end it here and have an extra soft consistency or you can use this amazing tool to take it to the next level…

Spoon into THIS strainer which will allow all of the additional whey to completely strain out. I’m telling you it will change your experience in yogurt making. This is where you get that thick, Greek consistency. You can see the video of how it turns out (HERE).

I continue to refrigerate it in container for an additional two days before transferring to container.

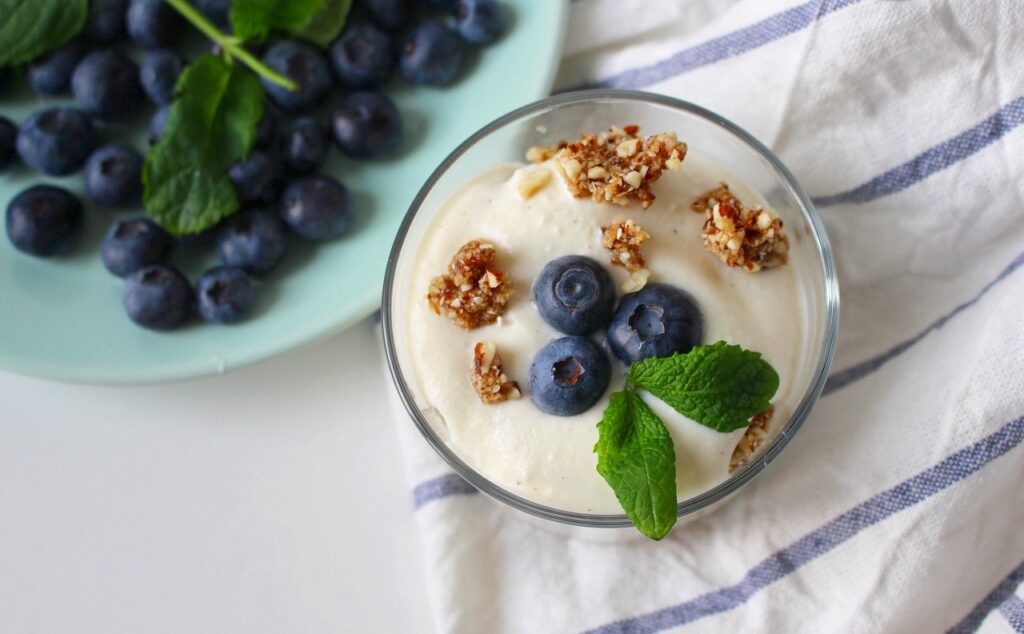
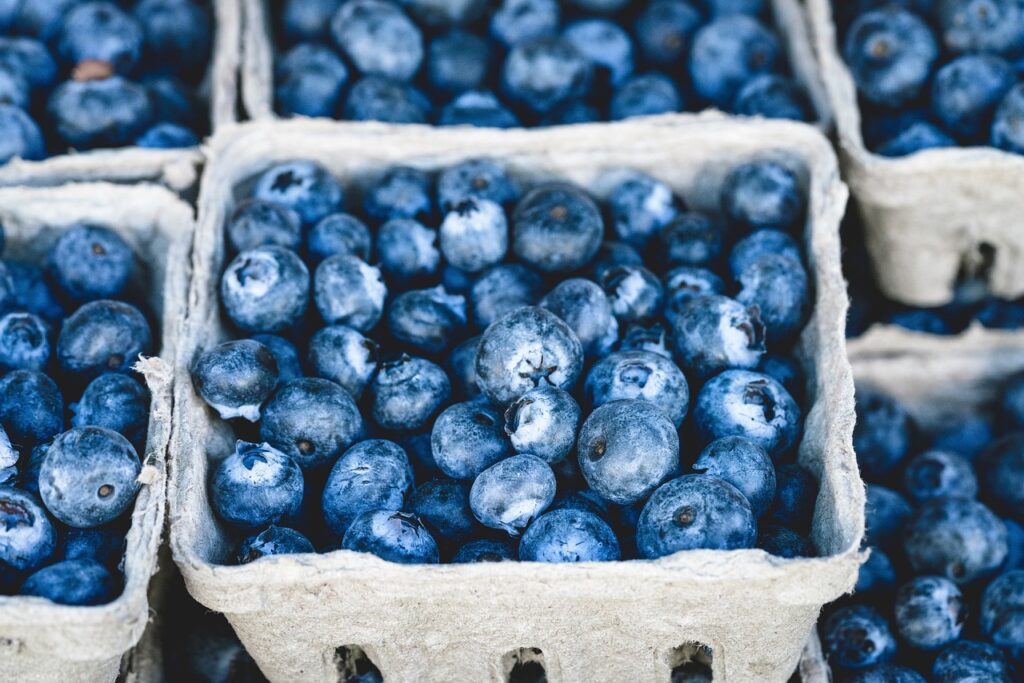
This is delicious topped with fresh fruit and granola – Enjoy!!

TIP: Take the store bought yogurt that you purchased for your culture and pour into  ice cube trays – freeze and store in a Ziploc bag to use in your next batch. Then simply save 2 tbsp. of your own yogurt when that’s gone to use as your own “starter”. 

Make Wine With Me

blueberries, bunch, berries-1326154.jpg

Want To Make Wine With Me?

I never thought I’d be mashing half rotten berries into a jar and making something called “Hooch”, but here I am…

Let’s just call it “Wine” and it hits differently.

So, I found myself buried in a couple  hundred pounds of blueberries this year, and after processing several batches I got burned out. There’s only so many pies we can bake and bags one can freeze before looking at one more berry becomes a form of torture. Especially when you have more waiting to be picked out in a 110 degree heat wave.

So here I am with 24 pounds of berries and I want something “easy” to do with them. Well, I found a recipe!

Don’t worry… This is SO EASY, and I’m here for ya if you want to lean on me while you pull it together.

Here’s All You Need:

  1. Three pounds of Berries
  2. Three half-gallon sized Mason Jars
  3. Three Fermentation Lids (I found some really affordable ones here
  4. 1 Gallon Filtered Water
  5. Yeast (I used THIS fancy yeast especially designed to ferment a good Wine)
  6. 1 Cup Sugar
  7. Thermometer
  8. Large Spoon
  9. A very large Pot


Okay, so here’s how it all goes down… Gather your supplies.

  • Start your water on boil
  • Add sugar & stir until dissolved
  • Mash Blueberries 
  • Add to water & remove once it begins to boil
  • Remove from heat and allow to cool to 100 degrees
  • Transfer to jars
  • Distribute 1 packet of yeast between the three (or 1/2 tsp per half-gallon of regular yeast)
  • Add Fermentation Lids 
  • Store in a cool, dark place for 1 week

So, if you don’t have fermentation lids, you can use a regular lid and burp it daily. This is a real pain, so you might want to rethink that! 

It’s pretty forgiving – you can substitute various elements to fit what you have on hand. Double the recipe if you’d like – I did & I’ll be serving up the hooch at our next shin-dig – haha!!

Now, are YOU going to be making Berry Wine? If you do, let me know! I haven’t quite made it to my 1 week mark, but I’ll definitely update ya on my Instagram Account soon. 

Unlocking the Health Benefits of Castor Oil Packs: A Natural Remedy Worth Trying

Unlocking the Health Benefits of Castor Oil Packs: A Natural Remedy Worth Trying

In the quest for improved health and wellness, I have exclusively turned to natural remedies which have been successfully used for generations. One remedy which has gained popularity in recent years is the castor oil pack, which I have been using every single day. Derived from the seeds of the Ricinus Communis Plant, Castor Oil, when combined with the application of a warm compress (known as a castor oil pack), has eliminated so many issues for me.

For one, it soothes Inflammation and Reduces Pain: Castor oil possesses potent anti-inflammatory properties. When applied topically, the oil penetrates deep into the tissues, promoting blood circulation and reducing inflammation. This makes it an excellent remedy for those like me who are suffering from joint pain, eczema, and gallbladder pain.

It also supports Digestive Health: Many people struggle with digestive issues such as bloating, constipation, and irritable bowel syndrome (IBS). Castor oil packs can be used on the abdomen to alleviate these discomforts. The oil’s lubricating properties help stimulate bowel movements and relieve pain. Additionally, it aids in detoxification by improving liver function and promoting the elimination of waste from the body. Regular use of castor oil packs can help restore balance to the digestive system, leading to improved overall gut health.

I have been using this for years to alleviate menstrual cramps by soaking a flannel, and covering the area with a heating pad while sleeping.

I personally recommend using the QUEEN OF THE THRONES Castor Oil Pack kit, which includes a trusted extra virgin, organic cold-pressed oil and a wrap that can be tied on for ease.

The therapeutic benefits of castor oil packs extend beyond conventional treatments, offering a natural and holistic approach to achieving optimal health. Whether you’re seeking relief from pain, improved digestion, detoxification support, or enhanced skin health, incorporating castor oil packs into your self-care routine can be a valuable addition. However, it’s important to consult with a healthcare professional before beginning any new health regimen, particularly if you have underlying health conditions. Embrace the power of nature and unlock the potential benefits of castor oil packs – you may find yourself on a journey towards improved well-being and vitality like I have.

How To Tincture A Pitcher Plant

How To Tincture A Pitcher Plant

I first heard about the Sarracenia Purpurea Plant a year ago when a friend shared news of possible new “virals” to be released in the coming years. She had found that this plant had once been used by the Native Americans in the aid of various pox, so I ordered it with the intention to create a Tincture for our Homestead Apothecary.

I kept it on the window sill in my Kitchen since last Summer. Despite the recommendation to place it in the refrigerator to make it go dormant over Winter, I allowed it to stay in the window and it flourished! 

These plants are a version of the Venus Fly Trap. With their cone shape and tiny hair-like tentacles inside their leaves, they attract and trap flies and other insects in order to aid in their nutrients.

As odd as that sounds, I’ve really enjoyed growing these, and intend to repot it this Spring. These plants thrive in a tight environment and must be watered from the bottom up with distilled water.

(I have published a Video all about the growing and harvesting process on our YouTube Channel that you can watch HERE.) 

You can print out a free instruction card on how to create this Tincture by clicking HERE.

Go Analog: The Power of Physical Copies

The Importance of Physical Copies in a Digital Age: Emergency Preparedness, Self-Reliance, and the Joy of Holding a Book

In our digital age, we’ve become accustomed to relying on technology for everything. But what happens when technology fails us? That’s why it’s essential to have physical copies of important information, such as emergency protocols, maps, home remedies, and self-reliance guides.

A few years ago, we decided we should throw it all out and go digital. But we accidentally cut off our lifeline in the event of a digital interruption. It didn’t feel possible then, but it sure does now…

Sure, having digital versions of these resources on our devices can be convenient, but what if you can’t access them? In an emergency situation, you might not have access to the internet, a storage cloud may fail or your device could run out of battery. Having physical copies of  the important things can help you stay prepared for any situation. You never know when you might need to refer to a first aid manual or a guide on how to purify water in a pinch.

But it’s not just emergencies that physical copies can be useful for. Self-reliance guides, such as books on homesteading, can provide you with valuable skills and knowledge that can help you live a more self-sufficient lifestyle. In our ever-changing world, it’s becoming increasingly important to be able to rely on ourselves and our communities. And while you can certainly find information on self-reliance online, having physical copies of these resources can provide a more immersive and engaging learning experience.

And let’s not forget about the simple joy of holding a physical book in your hands. There’s something special about flipping through the pages of a well-worn book, underlining key passages and taking notes in the margins. Writing things down with pen and paper can also be a more intimate and personal experience than typing up a digital version.

While technology has made many aspects of our lives easier, it’s essential to remember that it can fail us. Having physical copies of references, maps, recipes, addresses and instructions  can help ensure that you’re prepared for any situation. And in addition to their practical benefits, physical books can provide a sense of comfort to living a self-reliant lifestyle, that’s becoming increasingly rare in our digital age. So why not consider investing in some physical books on these topics?

Some things you may want to convert from digital to physical:

  • Physical copies of Important Legal Documents
  • A list of your Bills, including Account Numbers & Contact Information
  • Emergency Contacts (i.e. a good old-fashioned Address Book)
  • Maps of your City, State & Country
  • Banking Information
  • Homestead Protocols
  • Insurance Records
  • A Medical Reference Handbook
  • Notebooks
  • Books on Wild Foraging, Emergency Preparedness, Animal Husbandry, Gardening, Natural Healing, Herbal Remedies, Cooking, etc.

We added this Atlas to our Emergency Kit, which makes an excellent travel companion when we’re out of service range – Click Here.

I hope that this list helps spark a change for you, and that you add to it to meet your needs!